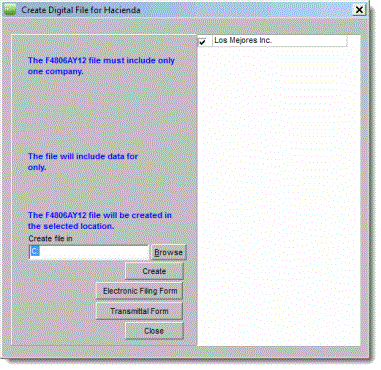
This section shows how to create the informative returns' electronic file for Hacienda. This file should be sent to Hacienda through the Colecturía Virtual.
Make sure you have not marked the returns as Completed.

The file name of the informative return includes the following information: F=File; 4806A=type of return created; Y=Year; XX=the last two digits of the tax year.
The digital file automatically includes the 480.5 return for the 480.6A, 480.6B, 480.6C, 480.6D, 480.7, 480.7A, 480.7B, 480.7C, and 480.7D Informative Returns.
If you are creating the electronic file for the 480.6B, a pop-up window will ask if you want to also create the electronic file for the 480.6B.1 report. To create it, you must have the 480.6B.1 report created on the Data Entry section. If you chose to create the electronic file of the 480.6B.1 report, two files will be created: F4806BYXX and F4806B1YXX (XX=tax year). Make sure you include both files when creating the data file.
If an alert message appears stating that Preparer's data is missing, make sure the following information is completed in the Preparer's window: Preparer's name, company, telephone, email, employer ID, and PIN for the SSA. Make sure the Addresses tab includes the W-2 and 480 Addresses.
If a message appears stating to add control numbers for the informatives selected, make sure you entered the control numbers in the Informative tab and assigned them in Step 2: Assign Control Numbers.
On the transmittal form, make sure that the contact name and phone number are complete and correct.
©PRSoft, Inc. January, 2013
All Rights Reserved.
753 Hipódromo Ave.
San Juan, PR 00909
Tel (787) 622-7550
Fax (787) 641-3013